How is an Irrigation System Installed? Step-by-Step Guide
Are you tired of spending hours watering your garden or lawn every day? Installing an irrigation system can save you time, water, and effort while keeping your plants healthy and green.
But how exactly is an irrigation system installed? If you’ve ever wondered about the process, this article will guide you step-by-step through everything you need to know. By the end, you’ll feel confident about setting up your own system or knowing what to expect when hiring a professional.
Let’s dive in and make watering your outdoor space easier than ever!
Planning The Layout
Installing an irrigation system starts with careful planning. This step helps save water and money. It also ensures that plants get the right amount of water. A good layout shows where pipes and sprinklers will go. It matches the garden’s shape and size perfectly.
Assessing Your Garden
First, measure your garden area accurately. Note the length and width of each part. Mark places where plants need more water. Look for slopes or low spots where water may collect. These details affect how water flows in your system.
Choosing Water Sources
Find a reliable water source near your garden. It could be a tap, well, or rainwater tank. Check the water pressure to ensure it can support sprinklers. Low pressure may need a pump to work well.
Designing The Pipe Layout
Plan pipes to cover every part of the garden. Use main lines to carry water from the source. Then add smaller branch lines to reach each sprinkler. Keep pipes close to plants but avoid walking paths. This prevents damage and keeps the system hidden.
Placing Sprinklers And Drip Lines
Sprinklers should cover all plants without wasting water. Space them so their spray overlaps a little. Drip lines work best for bushes and flower beds. They deliver water slowly and directly to roots.
Creating A Simple Layout Plan
Step | Task | Important Tips |
1 | Measure Garden | Use tape measure; note all shapes and sizes |
2 | Mark Plant Zones | Identify areas needing more water |
3 | Check Water Source | Test pressure; ensure easy access |
4 | Draw Pipe Routes | Avoid paths; keep pipes hidden |
5 | Place Sprinklers | Overlap spray; cover all plants |
Choosing The Right System
Installing an irrigation system helps plants get water easily. It saves time and effort. Different types of systems work better in different places. Choosing the right one means your plants grow well. It also saves water and money.
Drip Irrigation
Drip irrigation delivers water slowly to plant roots. It uses tubes with small holes. Water drops directly on soil. This reduces water waste. It is good for gardens and rows of plants. It keeps leaves dry, which helps stop disease.
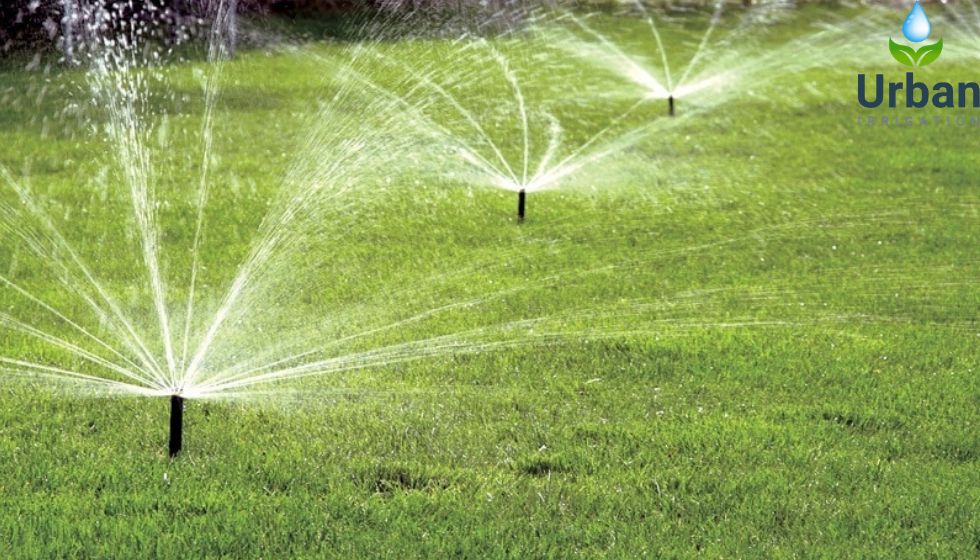
Sprinkler Systems
Sprinklers spray water over a large area. They work like rain. This system fits lawns and big gardens well. Sprinklers can be fixed or moveable. It is important to set timers to avoid overwatering. Sprinklers cover many plants at once.
Soaker Hoses
Soaker hoses let water seep out slowly along the hose. They are easy to install and good for flower beds. The water goes deep into the soil. This keeps roots healthy. Soaker hoses use less water than sprinklers.
Factors To Consider
- Plant type: Some plants need more water than others.
- Soil type: Sandy soil drains fast, clay soil holds water longer.
- Water source: Make sure there is enough water pressure.
- Budget: Some systems cost more to buy and install.
- Maintenance: Choose a system that is easy to care for.
Gathering Materials And Tools
Installing an irrigation system helps keep plants healthy and green. It saves water and time by watering plants evenly. Before starting, it is important to gather the right materials and tools. This makes the installation easier and faster.
Start by collecting all the necessary materials. These include pipes, connectors, sprinklers, valves, and a timer. It is important to choose the right size and type for your garden.
Next, prepare the tools needed for installation. Common tools are a shovel, pipe cutter, measuring tape, and screwdriver. Having these ready saves time and helps avoid mistakes.
Materials | Tools |
Pipes (PVC or polyethylene) | Shovel |
Connectors and fittings | Pipe cutter |
Sprinkler heads | Measuring tape |
Valves and timer | Screwdriver |
Backflow preventer | Wrench |
Check the list twice. Missing parts slow down work. Buy extra connectors and pipes for safety.
Preparing The Site
Installing an irrigation system starts with preparing the site carefully. This step is very important for the system to work well. You need to clear the area and check the land condition. Good preparation helps water reach plants properly and saves water.
Clearing The Area
Remove any plants, rocks, or debris from the installation area. This makes it easier to lay pipes and place sprinklers. Clear the ground so it is flat and free from obstacles.
Checking The Soil Type
Soil type affects how water moves and stays in the ground. Sandy soil drains quickly, while clay soil holds water longer. Knowing the soil helps choose the right irrigation method.
Measuring And Marking The Layout
Measure the area carefully to plan the pipe and sprinkler positions. Use stakes and strings to mark where to dig. This step avoids mistakes during installation.
Collect all needed tools like shovels, pipes, connectors, and sprinklers. Having everything ready saves time and makes work easier.
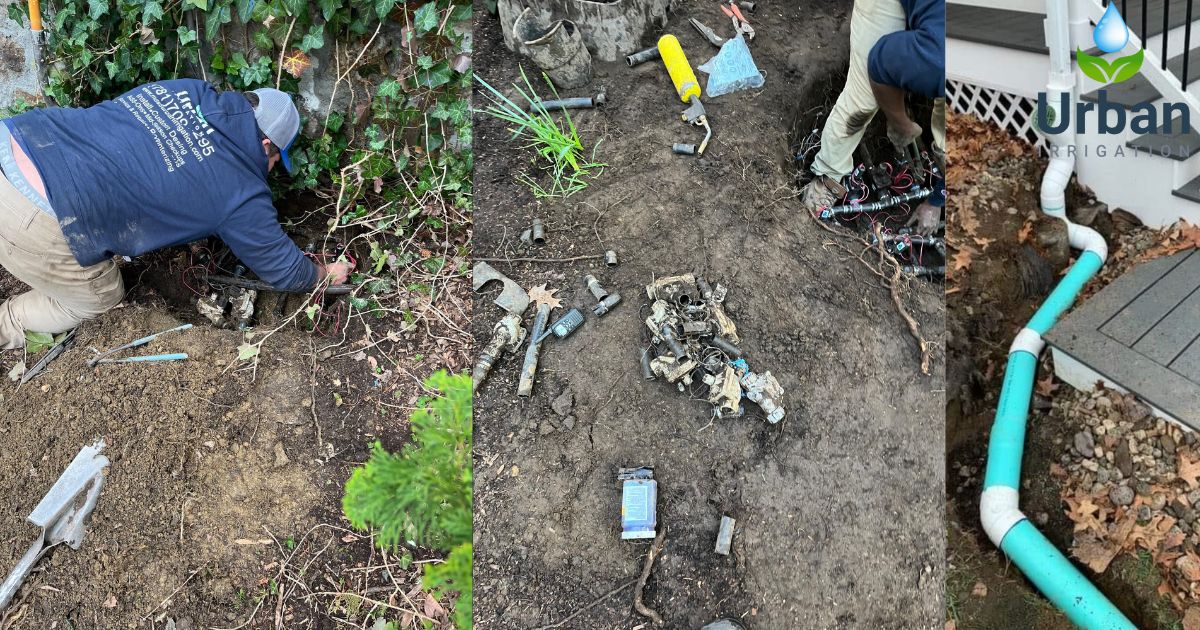
Installing Main Lines And Valves
Installing an irrigation system starts with laying the main lines and valves. These parts carry water from the source to the plants. The main lines are usually large pipes that supply water. Valves control when and where the water flows. Proper installation ensures the system works well and lasts long.
Choosing The Right Main Lines
The main lines must be strong and able to handle water pressure. Usually, PVC pipes are used because they are durable and cheap. The size of the pipes depends on the area to water. Bigger areas need bigger pipes to carry enough water.
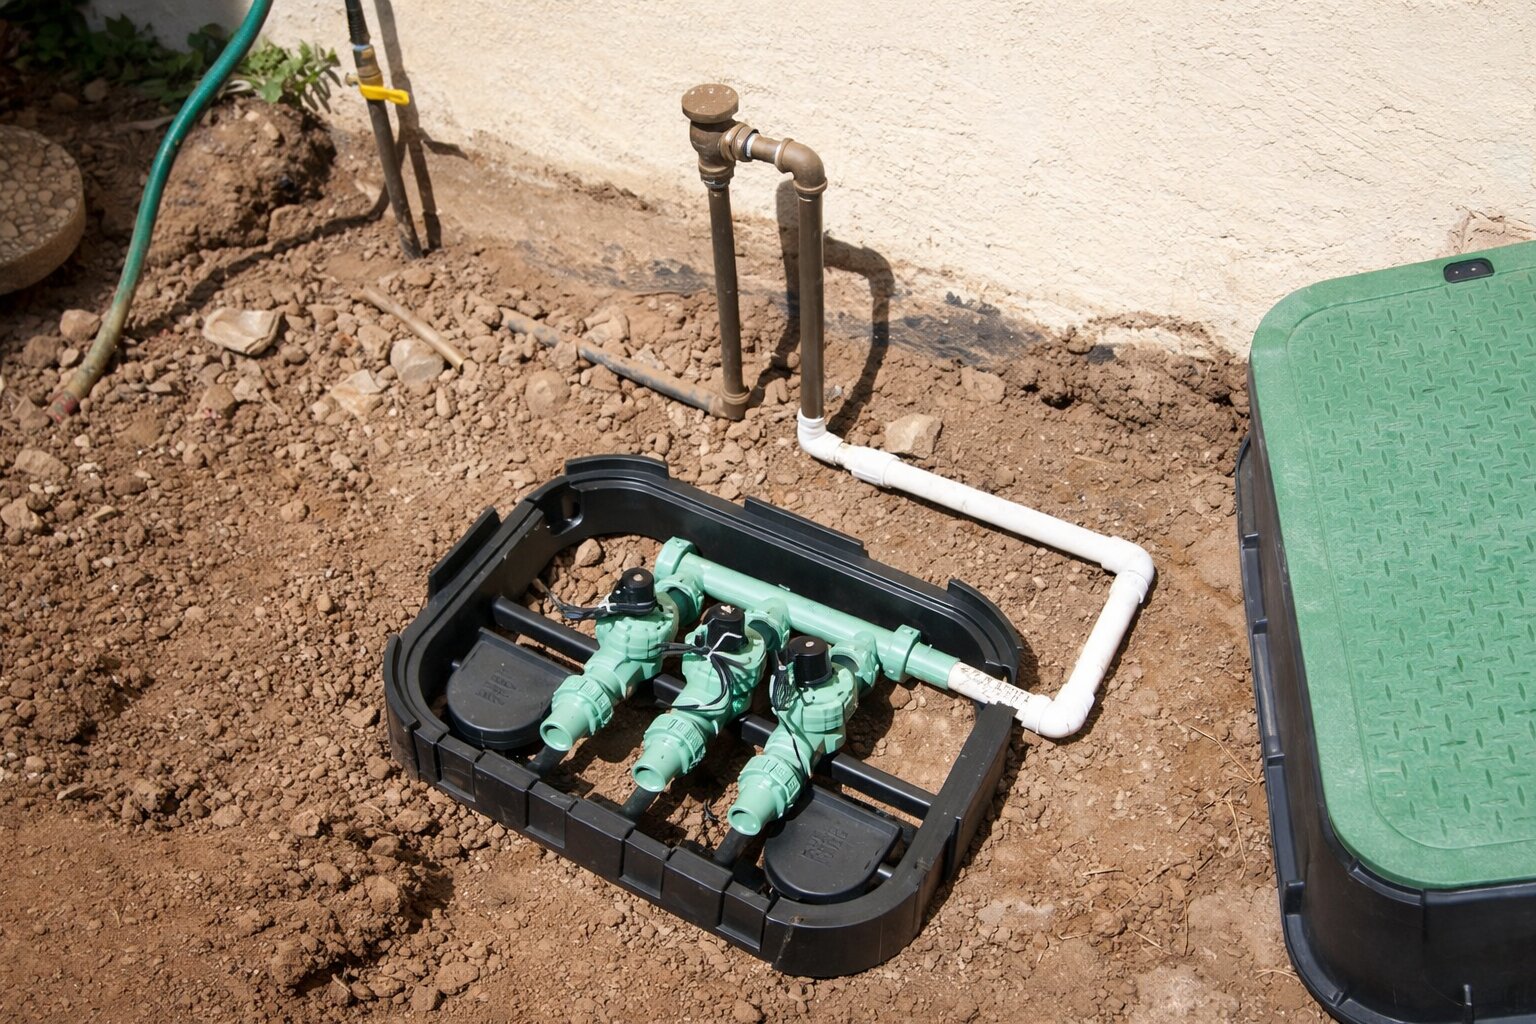
Planning The Valve Placement
Valves must be placed where they are easy to reach. They should be near the water source or in a valve box underground. This helps with easy repairs and control. Each valve controls a zone or section of the irrigation system.
Steps To Install Main Lines And Valves
- Mark the trench path for the main lines using spray paint or flags.
- Dig trenches about 8 to 12 inches deep to protect pipes.
- Lay the PVC pipes carefully inside the trench without sharp bends.
- Attach valves to the main lines using primer and cement for a tight seal.
- Test the system by turning on the water to check for leaks.
- Cover the trenches with soil after confirming everything works well.
Tools And Materials Needed
Tool/Material | Purpose |
PVC Pipes | Main water lines for carrying water |
Valves | Control water flow to different zones |
Trenching Tool | Dig trenches for pipes |
Pipe Cutter | Cut pipes to correct lengths |
Primer and Cement | Join pipes and valves securely |
Valve Box | Protect and access valves easily |
Setting Up Emitters And Sprinklers
Installing an irrigation system helps plants get the right amount of water. It saves time and water by delivering water directly to plants. Emitters and sprinklers are key parts of this system. They control where and how water flows in your garden or farm.
Choosing The Right Emitters
Emitters release water slowly at the base of plants. Choose emitters based on the type of plants and their water needs. Some emitters release water drop by drop, while others spray a small area.
Use drip emitters for plants that need less water. Use micro-sprayers for plants that need wider coverage. Make sure emitters are easy to clean and maintain.
Placing Emitters Properly
Place emitters close to plant roots. This helps water reach where plants need it most. Spacing depends on plant size and water needs. For example, small plants need emitters closer together.
Avoid putting emitters too close to stems to prevent rot. Check that water flows evenly from each emitter. Adjust placement if some plants get too much or too little water.
Selecting Sprinklers For Larger Areas
Sprinklers cover bigger spaces like lawns or flower beds. Choose sprinklers that fit the size and shape of your area. Fixed sprinklers water a small, fixed area. Rotating sprinklers cover larger circles or rectangles.
Consider water pressure before picking sprinklers. Low pressure needs sprinklers designed to work well with less force. High pressure allows sprinklers to spray water farther.
Installing Sprinklers Correctly
Place sprinklers so their spray areas overlap slightly. This avoids dry spots in your lawn or garden. Keep sprinklers away from walkways and walls to prevent water waste.
Adjust sprinkler heads to aim water where plants grow. Check that sprinklers turn on and off with your system timer. Clean sprinkler heads regularly to keep water flowing well.
Testing And Adjusting The System
Testing and adjusting the irrigation system is a key step after installation. This step makes sure the system works well and waters plants evenly. It helps find leaks, clogs, or areas with too much or too little water. Taking time to check the system avoids problems later and saves water and money.
Check Each Sprinkler Head
Turn on the system zone by zone. Watch each sprinkler head closely.
- Make sure water sprays in the correct direction.
- Look for uneven water patterns or dry spots.
- Clear any debris blocking the spray.
Adjust the heads by turning or moving them. This gives better coverage.
Look For Leaks And Drips
Inspect pipes and connections for water leaks or drips.
- Check under the ground and near valves.
- Watch for wet spots or puddles that appear when off.
Fix leaks quickly to save water and avoid damage.
Test Water Pressure
Water pressure affects how well the system works.
Pressure Level (psi) | Effect on Irrigation | Action Needed |
Less than 20 | Sprinklers may not spray far enough | Check for clogs or increase pressure |
20-50 | Ideal pressure for most systems | No action needed |
Above 50 | Water may spray too far or cause damage | Install pressure regulator or reduce pressure |
Adjust Watering Schedule
Set watering times based on plant needs and weather.
- Water early in the morning or late in the evening.
- Avoid watering during windy days.
- Adjust frequency during rainy or dry seasons.
Use timers to control watering length and start times.
Frequently Asked Questions
What Are The Basic Steps To Install An Irrigation System?
Start by planning the layout and measuring your area. Next, dig trenches for pipes and place the main water line. Finally, install sprinkler heads and connect the system to a water source.
Lorem ipsum dolor sit amet, consectetur adipiscing elit. Ut elit tellus, luctus nec ullamcorper mattis, pulvinar dapibus leo.
What Tools Are Needed For Irrigation System Installation?
Common tools include a shovel, pipe cutter, and a tape measure. You also need connectors, sprinkler heads, and a timer for automation.
How Long Does It Take To Install An Irrigation System?
Installation time depends on the system size and complexity. Small gardens may take a few hours, while larger lawns could need one or two days.
Conclusion
Installing an irrigation system takes careful planning and simple steps. Start by choosing the right layout for your garden or lawn. Next, connect pipes and sprinklers with clear instructions. Test the system to ensure water flows evenly. Regular checks help keep it working well.
A good irrigation system saves water and time. It keeps plants healthy and green. Taking time to install it properly pays off in the long run. Your garden will thank you with lush growth and less effort. Easy to follow steps make the process smooth and rewarding.
Leave A Comment